|
| Tema |
|---|
| SampleTopic |
| Nivel |
| Beginner |
| Tiempo para completar |
| 5 minutes |
| Autor |
| Mario52 |
| Versión de FreeCAD |
| All |
| Archivo(s) de ejemplo(s) |
| None |
Contents |
Synopsis
This tutorial shows you the customization of toolbars. Tools (inclusive Macro-tools) can used in different workbenches. In an example a Macro becomes a Macro-tool by creation of a Menu text, a Tool tip and an Icon. Afterwards this Macro-tool becomes part of an extra toolbar in a workbench.
Use
1. Find the Customize Menu
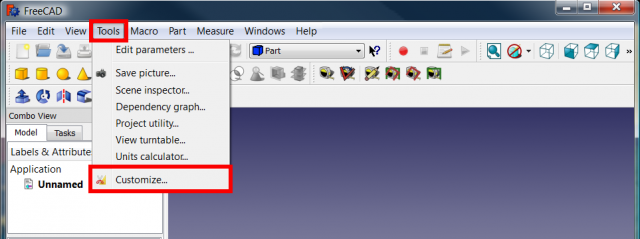
- Click Main Menu → Tools → Customize,
- or right click on any toolbar.
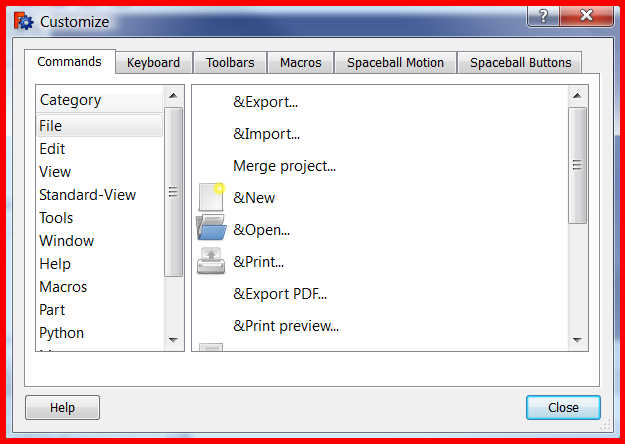
- The Customize window appears.
2. Make a Macro to a Macro-Tool
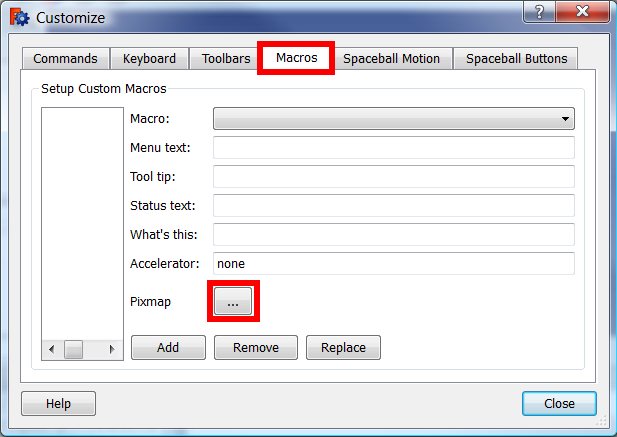
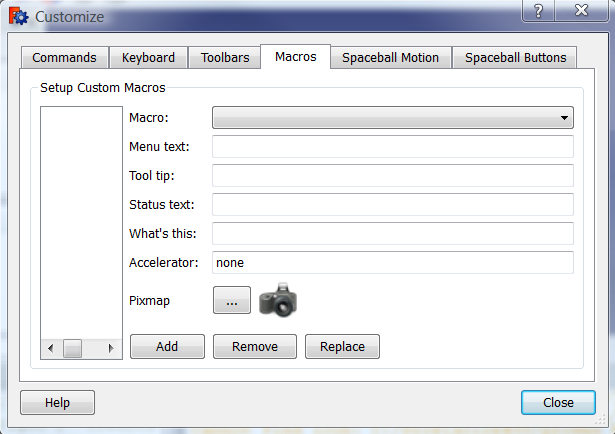
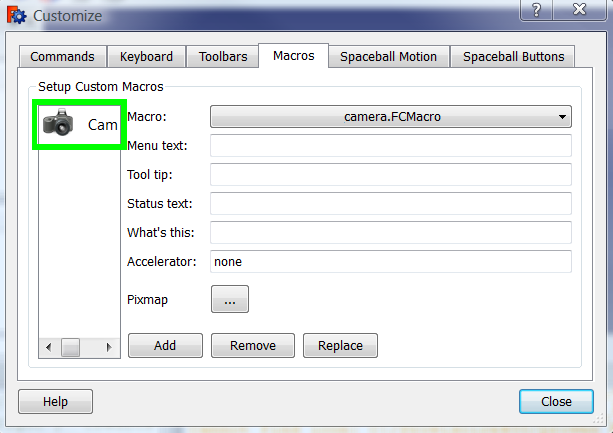
- Select the "Macro" tab.
- To add an icon for the provided macro click the Pixmap button (labelled ... ).
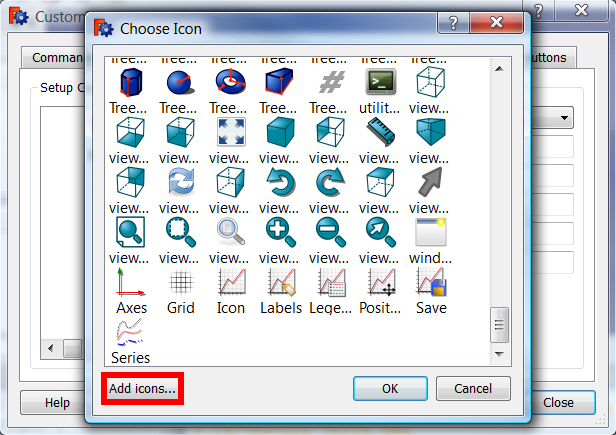
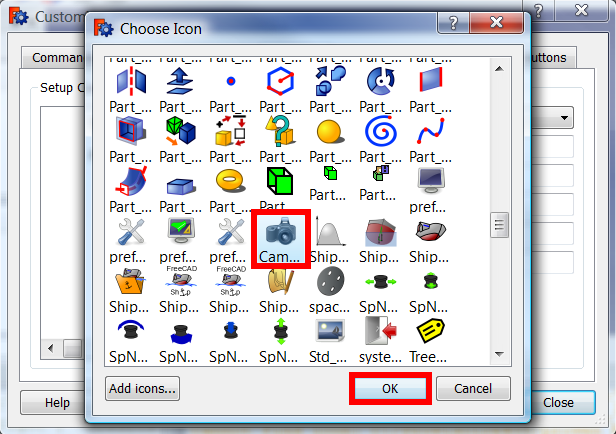
- Search for an appropriate icon from amongst FreeCAD's existing icons,
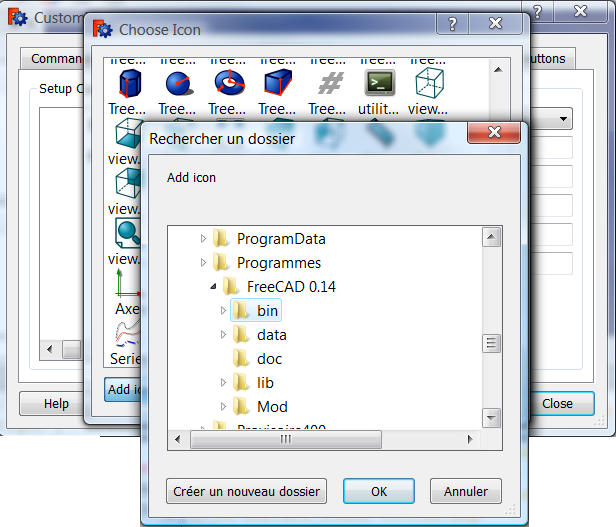
[or add your own icon by clicking Add icons...]. (expand for an example)
- Select your icon and click OK.
- The icon you selected is now displayed next to the Pixmap button labelled ....
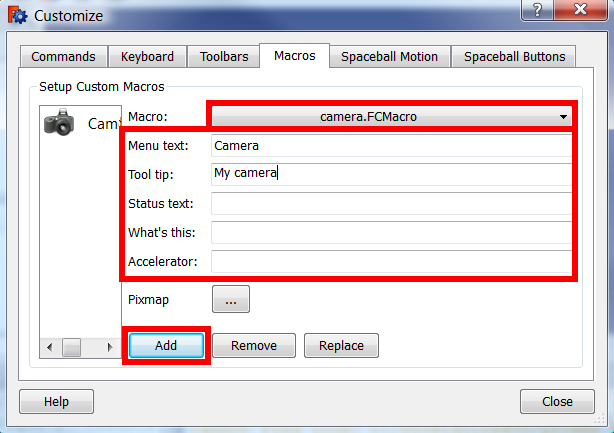
- Select the provided macro in line Macro:' and specify a Menu text: (which will appear as the text label in the menu); also fill in the Tool Tip': (which is the text that will appear when a mouse is over the button on the toolbar); further lines are optional.
- Click the button Add.
- The button of the macro-tool is now created.
3. Create a toolbar outside the workbench Macro which contains the created Macro-tool
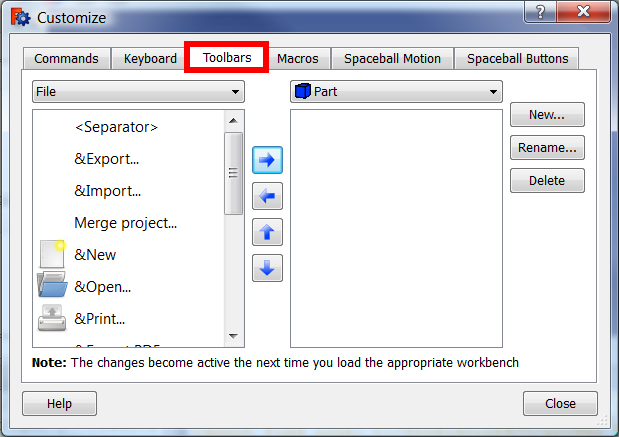
- Select the Toolbars tab and choose the workbench (for which the toolbar is provided) in the drop down on the right (Part in this example).
[Since version 0.15 there is a Global toolbar. If this is selected, the provided toolbar will be in each workbench.]
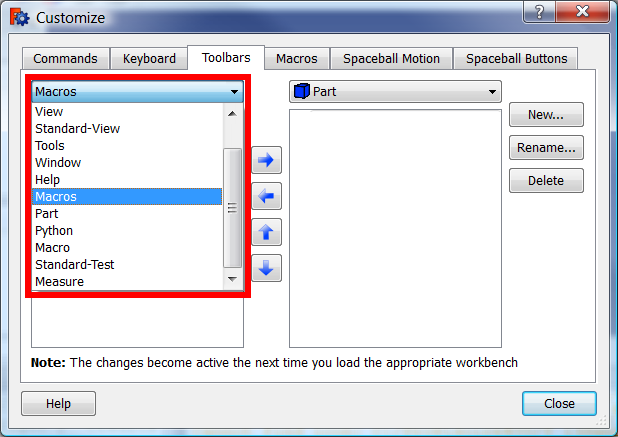
- In the dropdown on the left select Macros.
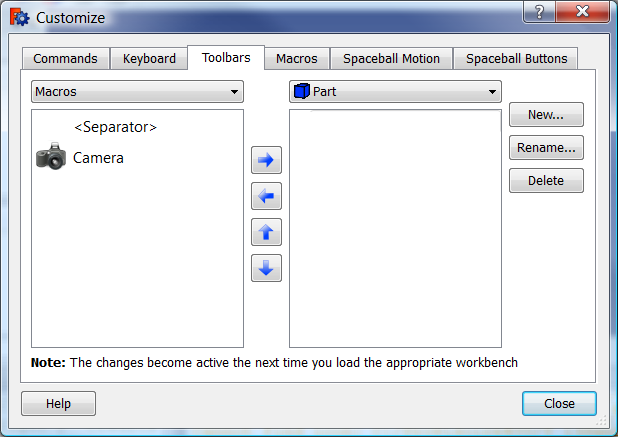
- The macro-tool with its icon appears in the list.
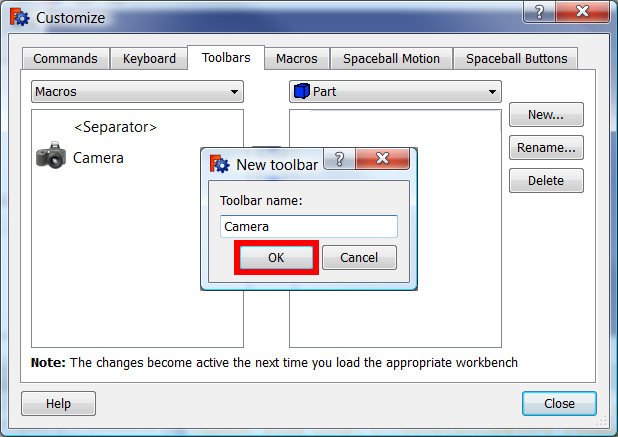
- Click the button New...
- In the window "New Toolbar" enter the name of the provided extra toolbar for the Part Workbench and click OK
- The toolbar is now created.
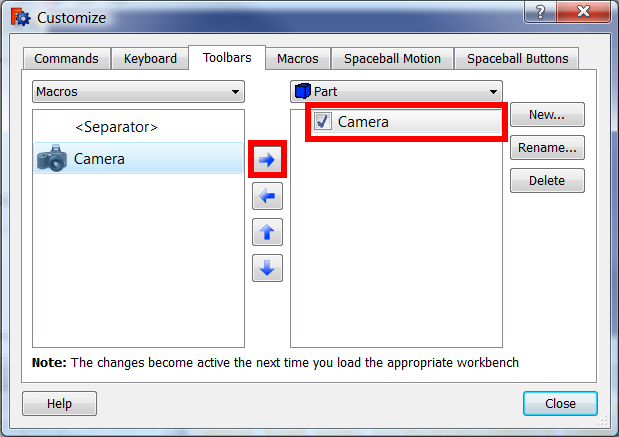
- To add the creadet macro-tool to this toolbar, select it in the left window and then click the Button with the arrow pointing right.
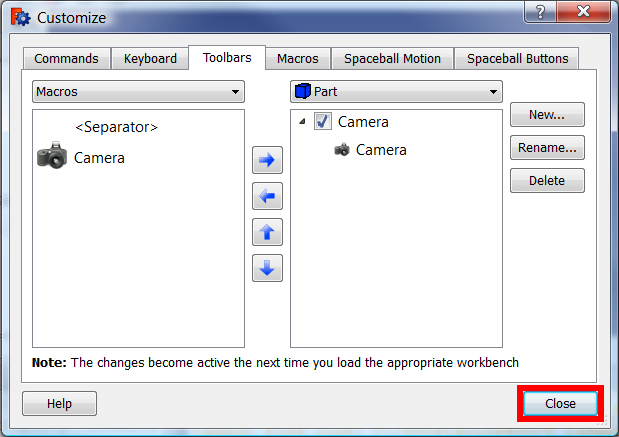
- You have created now a toolbar called "Camera" (with the Macro-tool Camera in it)
- Click the Close button.
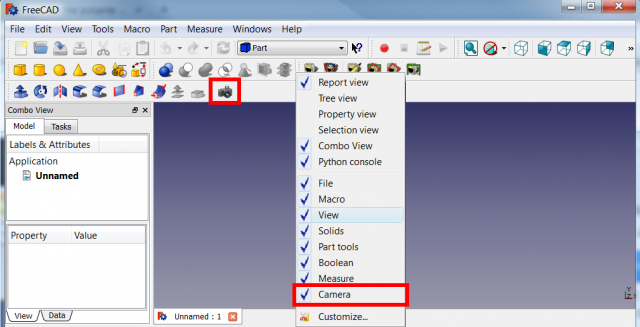
- Your new toolbar is now contained in the toolbars' right-click menu. Its Icons (in our example only the camera) are visible, if the toolbar is activated (blue checkmark).
