|
| Topic |
|---|
| Finite Element Analysis |
| Level |
| Beginner |
| Time to complete |
| 10 minutes + Solver time |
| Author |
| Drei |
| FreeCAD version |
| 0.16.6700 or above |
| Example File(s) |
Introducción
Este tutorial tiene como propósito el introducir al lector a la forma de trabajo básica del módulo FEM, así como a la mayoría de las herramientas disponibles para realizar un análisis estático.
Requirements
- FreeCAD version 0.16.6700 or above
- Netgen and/or GMSH is installed on the system
- In the case of GMSH, installation of psicofil's macro is recommended
- Calculix is installed on the system
- The reader has the basic knowledge to use the Part and PartDesign Workbenches
Procedimiento
Modelado
En este ejemplo un Cubo es utilizado como objeto de estudio, pero modelos creados en los bancos de trabajo Parte y Diseño de Parte pueden ser utilizados en su lugar.
- Crear un nuevo documento
- Activar el módulo Part
- Crear un Cubo
- Cambiar sus Dimensiones a las siguientes:
- Altura: 1.000 mm
- Longitud: 8.000 mm
- Ancho: 1.000 mm
Ahora tenemos un modelo con el que se puede trabajar.
Creating the Analysis
Netgen
- Select the model
- Click
 New mechanical analysis from the menu to create an analysis from the object that was selected
 - In the meshing dialog, click OK
También es posible arrastrar y depositar una malla a un Análisis Mecánico que no contenga una malla desde la vista del árbol
GMSH
El uso del macro de psicofil es recomendado, y es usado para este ejemplo.
- Active el macro
- Seleccione el objeto que desee utilizar, en este caso nuestro Cubo
- Habilite la opción Create Mechanical Analysis from mesh
- Clic OK
Hemos mallado nuestro objeto y estamos listos para agregar restricciones y fuerzas.
Constraints and Forces
- Hide the mesh from the Tree View.
- Show the original model
- Select
 Create FEM fixed constraint
 - Select the back face of the Cube (face on the YZ axis) and click OK
- Select
 Create FEM force constraint
 - Select the front face of the Cube (the face parallel to the back face) and set the Area load value to 9000000.00
- Set the Direction to -Z by selecting one of the face edges parallel to that direction.
- Click OK
Hemos establecido las restricciones y fuerzas para nuestro estudio estático.
Final preparations
- Select
 Mechanical material... and choose Calculix as the material
 - Click OK
Running the Solver
Standard Procedure
- Select the solver object
 contained in the Mechanical Analysis
 - Select
 Start calculation from the menu
 - Select Write Calculix Input File
- Select Run Calculix
- Click Close
Quick Procedure
- Select the solver object
 contained in the Mechanical Analysis
 - Click on
 Quick Analysis.
Analyzing Results
- From the Object Tree, select the Results object
- Select
 Show result
 - Choose among the different Result types to view the results
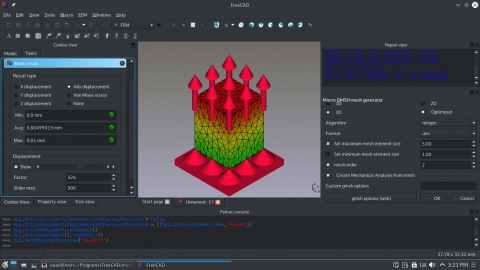
- The slider at the bottom can be used to alter the mesh visualization. This allows us to visualize the deformation experienced by the object, keep in mind that this is an approximation.
- To remove the results select
 Purge results
If you select the Z displacement result type, you can see that the obtained value is almost identical to the test example provided by FreeCAD. Differences may occur due to the quality of the mesh and the number of nodes it possesses.
We are now finished with the basic workflow for the FEM Module.
