|
| Topic |
|---|
| Raytracing |
| Level |
| Beginner |
| Time to complete |
| 10 minutes + Render time |
| Author |
| Drei |
| FreeCAD version |
| 0.16 or above |
| Example File(s) |
Introduction
This tutorial is meant to introduce the reader to the basic workflow of the Raytracing Workbench, as well as most of the tools that are available to create a rendered image.
Requirements
- FreeCAD version 0.16 or above
- POV-Ray and/or LuxRender is installed on the system
- In the case of POV-Ray, it's not enough to have just the binary executable in place, but it also requires the installation of supporting files, and in Ubuntu these are provided by the Recommends-flagged package povray-includes. Potential issues have also been seen with Linux installations requiring local configuration files to be manually created in a user's home folder, as discussed here.
- In the case of POV-Ray, installation of psicofil's macro is recommended
- The reader has the basic knowledge to use the Part and PartDesign Workbenches
Procedure
Modeling
In this example a Cube is used as the study object, but models created in the Part or PartDesign Workbenches can be used instead.
- Create a new document
- Activate the Part Workbench
- Create a Cube. You are free to change its properties in any way.
Now we have a model with which to work.
Preparing for the render
- Switch to the Raytracing Workbench
- Change your View to Perspective. Go to View menu and select Perspective.
- Set the location for the renderer. Go to the Edit menu and select Preferences. Click on Raytracing and set the location to the executable.
- Set the size of the rendered image. Go to the Edit menu and select Preferences. Click on Raytracing and set the desired image size.
POV-Ray
- Select
 New PovRay project. From the dropdown menu pick RadiosityNormal
LuxRender
- Select
 New LuxRender project. From the dropdown menu pick LuxClassic
Setting the camera position
- Position the 3D View to the desired location and distance from the model. In this case we will use the Axonometric View.
- Select the Project Folder from the Tree View
- Select
 Reset camera
Importing the model
- Select the model to render.
- Select
 Insert part
Running the Renderer
- Select
 Render.
 - Set the path to which the image will be stored.
- Wait for the rendering to finish. This may take a while.
Viewing the results
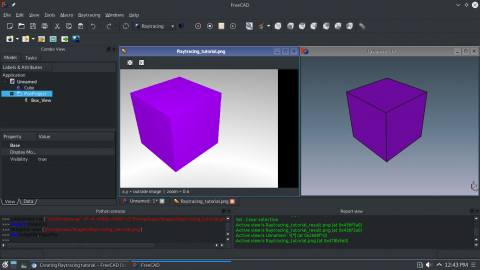
FreeCAD will immediately open the image after the render is finished.
We are now finished with the basic workflow for the Raytracing Module.
