|
| Thema |
|---|
| Programming |
| Niveau |
| Medium programmer |
| Zeit zum Abschluss |
| Not provided |
| Autor |
| Mario52 |
| FreeCAD version |
| All |
| Beispieldatei(en) |
| None |
Contents
|
Beschreibung
Diese kurze Anleitung soll zeigen, wie man in FreeCAD Makros installiert und benutzt.
Dieses Tutorial wurde unter Windows entworfen, möglicherweise müssen für andere Betriebssysteme Anpassungen vorgenommen werden. Es wurde aktualisiert, um auch auf Macintosh-Systemen zu gelten.
Python
Python ist eine Programmiersprache, die sehr einfach zu benutzen und sehr einfach zu erlernen ist.
Python-Dateien haben eine ".py"-Endung während FreeCAD-Makros (welche ebenso Python-Dateien sind) als Endung ".FCMacro" haben. Das Makro-Modul von FreeCAD kann auch ".py"-Dateien ausführen. Python wurde erfunden von Guido Van Rossun.
Das Makro-Menü und die Icons
Launch Record
Stop Record
Open Menu macro
Execute
Debug Macro
Stop
Location and destination of macros
This section shows you how to locate the folder containing your FreeCAD macros.
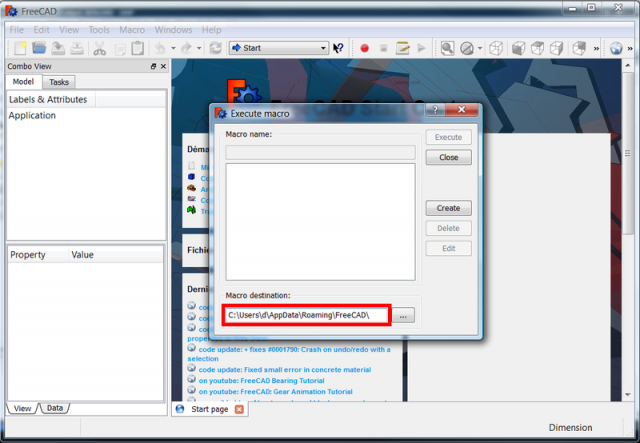
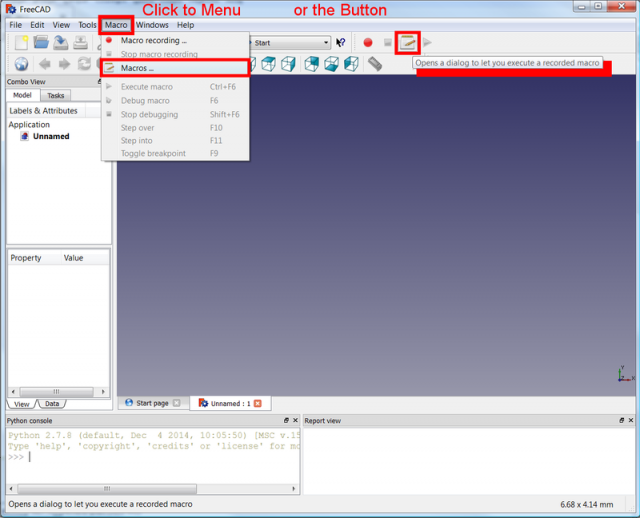
1 : click Menu > Macro > Macros (which has the icon and the tool tip "Open a dialog to let you execute a recorded macro")
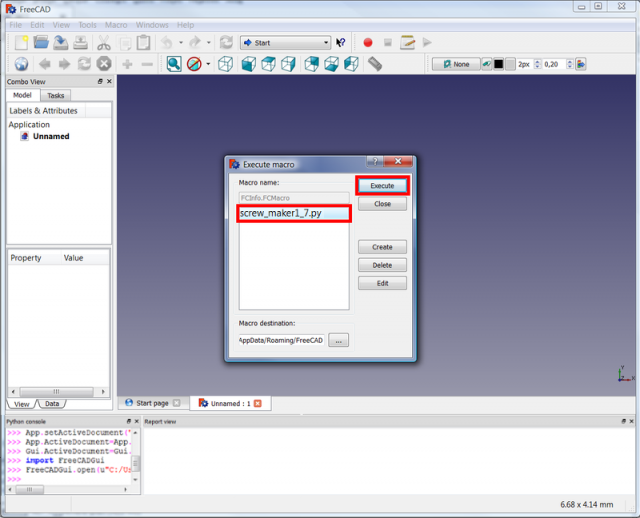
2 : This will open a dialog box
3 : The address of "Macro destination" (C:\Users\your_user_name\AppData\Roaming\FreeCAD\ in the screen snapshot below)
- Windows: the form is usually drive:\Users\your_user_name\AppData\Roaming\FreeCAD\
- Ubuntu: the form is usually /home/your_user_name/.FreeCAD
- Macintosh: the form is usually "/Users/your_user_name/Library/Preferences/FreeCAD"
4 : copy the address of "Macro destination" (here C:\Users\your_user_name\AppData\Roaming\FreeCAD\)
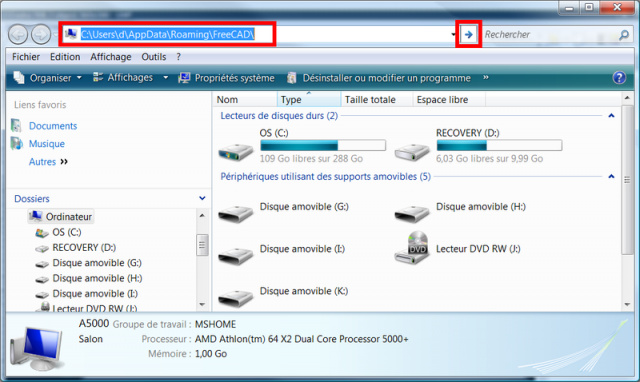
5 : View the macro folder by:
- Windows: paste the address into your File explorer and confirm
- Macintosh: locate the folder in the Finder or paste the address into a File explorer (remember the "file:///" prefix in the File explorer for a file on disk)
6 : Access the files by:
- Windows: leave open the file explorer
- Macintosh: either leave a Finder window open, or bookmark the location in your File explorer, or set up an Alias to point to it, or drag the folder into the SideBar of the Finder so it is there to use from other programs such as text editors etc. (Note: version 0.14 of FreeCAD does not support Aliases but does support the SideBar)
Section to read if you are not familiar with Python programming (common mistakes copy/paste).
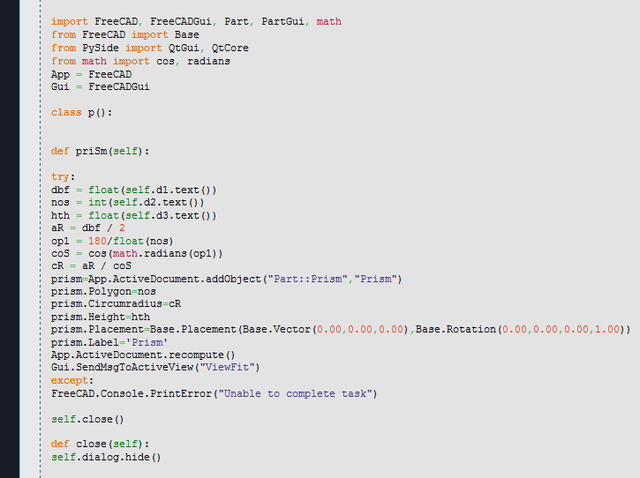
The indentation errors examples wrong code
The indentation in the python programming is very important and integral part of the code, a space or an inappropriate shift causes an indentation error ex :
<unknown exception traceback><type 'exceptions.IndentationError'>: ('expected an indented block', ('C:/Users/d/AppData/Roaming/FreeCAD/Macro_Apothem_Based_Prism_GUI.FCMacro', 21, 3, 'def priSm(self):\n'))
gives the error returned 'expected an indented block' block indentation expected to line 21, 3, normal after a class p (): must be the next line an indentation at least one space.
1 : In this example, the code was stuck without any indentation and of course does not work! here definitely a programmer error when pasting the code on the page as it would have never known it to work.
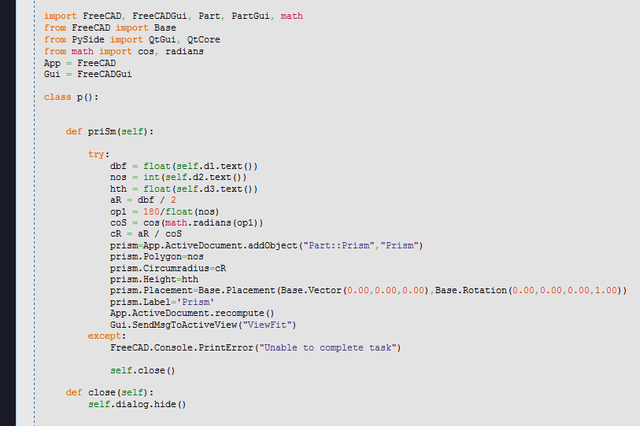
2 : the code was correct indentations in the right place.
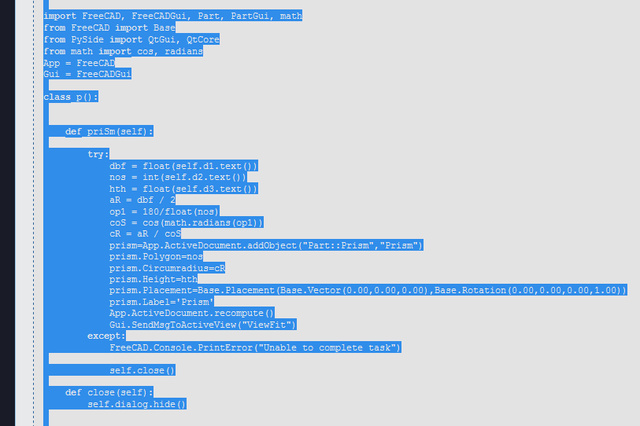
3 : we select the code, and we see that the selection is at the edge of the code, the macro must works so good
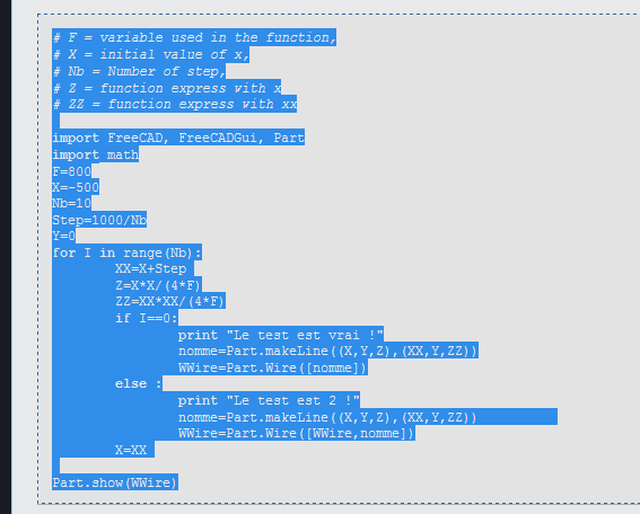
4 : Here additional space is selected (it can happen) then you need to copy the code into a word processor to remove one space all lines
5 : Here the code has been copied in a forum window with the Select all button apparently the selection is good
6 : But the selection pasted into the FreeCAD editor gives a surprise, an indent of four spaces has been added by the system ? the code is not good
7 : You must delete all the extra space that is four spaces on each line, for Windows word processing notepad-plus-plus enables vertical selection with a combination of buttons Alt + Mouse dragging or Menu> Edit> Indent> Decrease the indentation
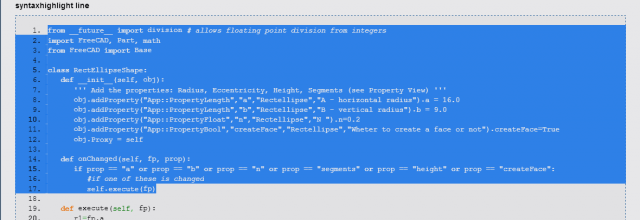
8 : Here the selection also take the column numbers which will also give an error
9 : Perfect code.
Method 1:
Method copy the code in one window and paste in the FreeCAD editor
For example we will copy the macro Macro_Apothem_Based_Prism_GUI
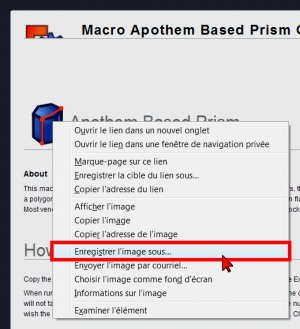
If there are one or more icon (s) download also position your mouse over the icon, click the right mouse button and click "Save image as ..." the icon or icons are placed in the macro directory and one of these icons serve as a shortcut icon to place on the toolbar.
After copying your code we will paste the code in FreeCAD editor.
1 : Open FreeCAD and open the editor in FreeCAD
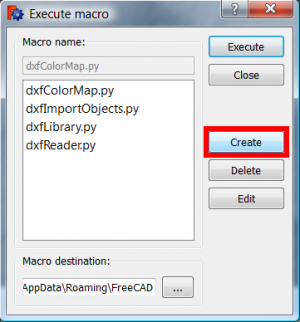
2 : The window macros file opens, click Create button
3 : A new window opens, enter the macro name (here "Macro_Apothem_Based_Prism_GUI")and click the create Ok button
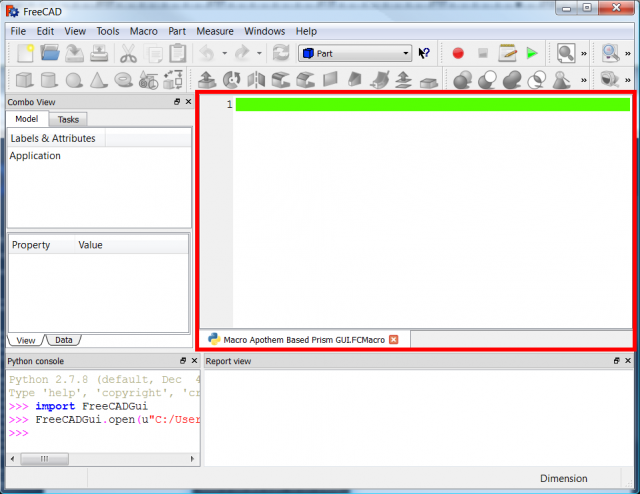
4 : The editing window FreeCAD macros is now available and has the name of our future macro.
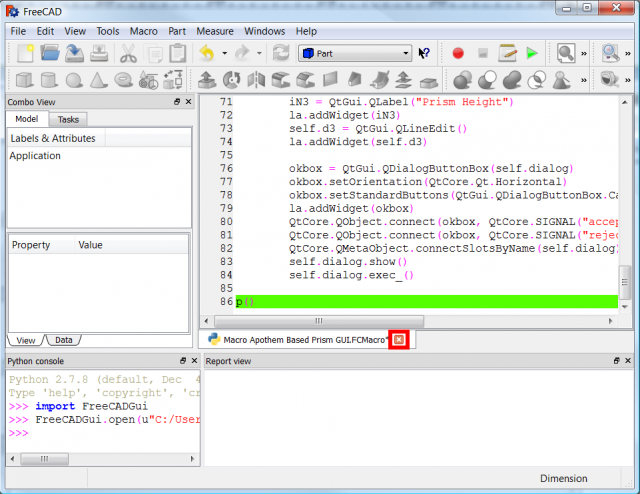
5 : Paste your code in the macro editor window and click the little cross to close the window.
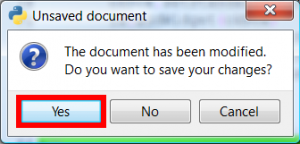
6 : A warning window appears asking for confirmation of save code, click on Yes
PS: For the change silk consideration must save the macro and reopen it and just run it.
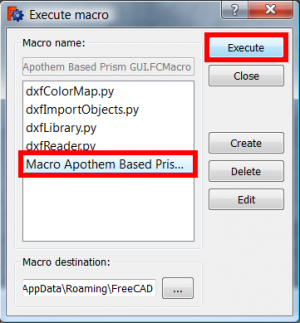
7 : Repeat the number 1 : , Click on your new macro and button Execute
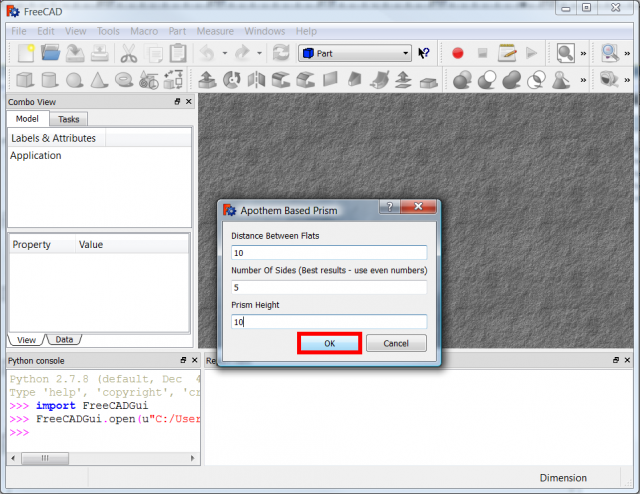
8 : The macro runs, complete the fields with your values and click the OK button
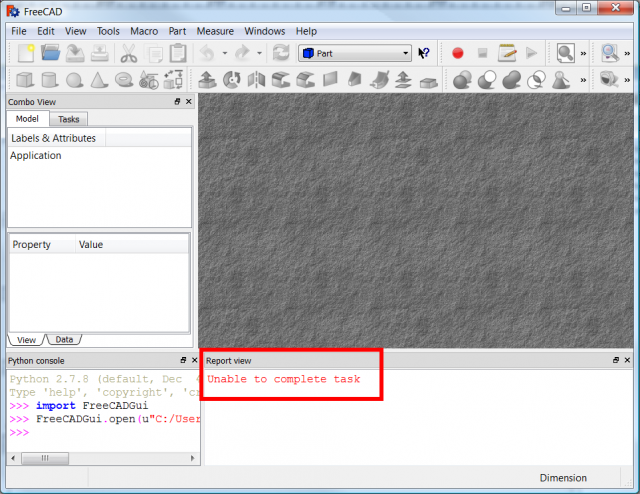
9 : The macro returns an error ! we do not have to open document, open a document and repeat the operation 7 and 8. Some macros open a new document if it does not find one.
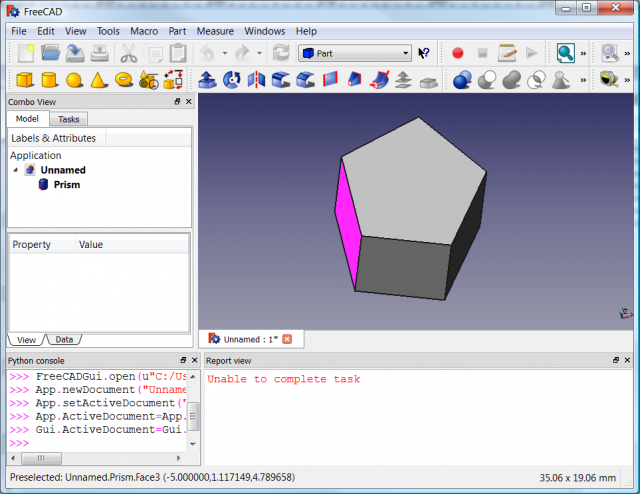
10 : Here is your prism
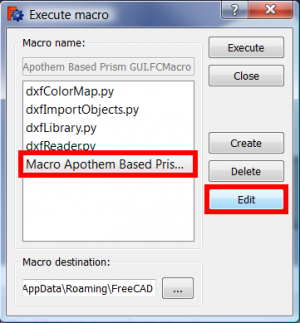
11 : You can also open your macro in the editor to run or modify, click the Edit button
12: The macro is now in the FreeCAD editor you can run through the menu "Macro Run Macro" or by clicking on the triangle green in the macros toolsbar
Method 2:
Method macro in a compressed .ZIP file
Download the file compressed here (example) Macro_screw_maker 1.7. (the page Macro_screw_maker)
Free for Windows 7-zip ou L-Zarc ou quickzip
For Linux use this on the terminal
unzip your_file.zip -d your_directory
you must unzip the zip and copy the file (or all the files and folders) in your macro directory.
Process
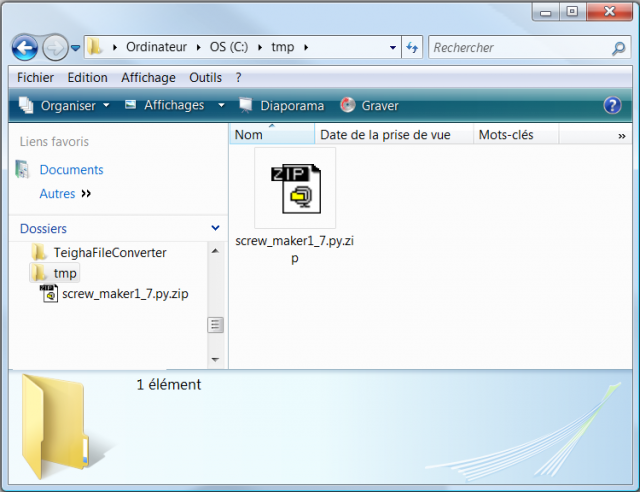
1 : Download your file in your local folder here the folder Temp
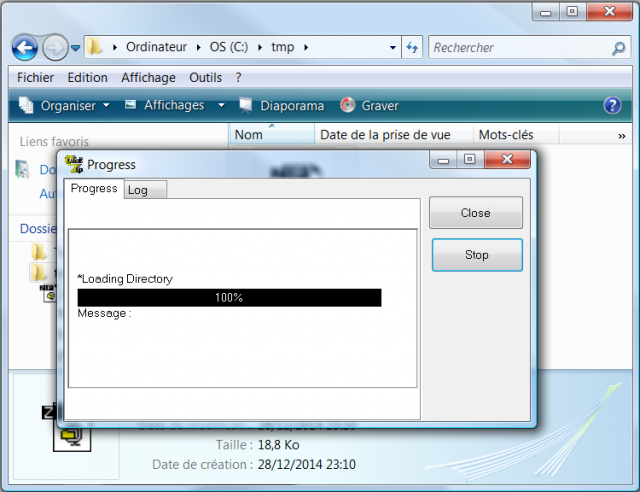
2 : Unzip your file in the folder.
3 : The decompressor finished his work and created a new folder with the unpacked file
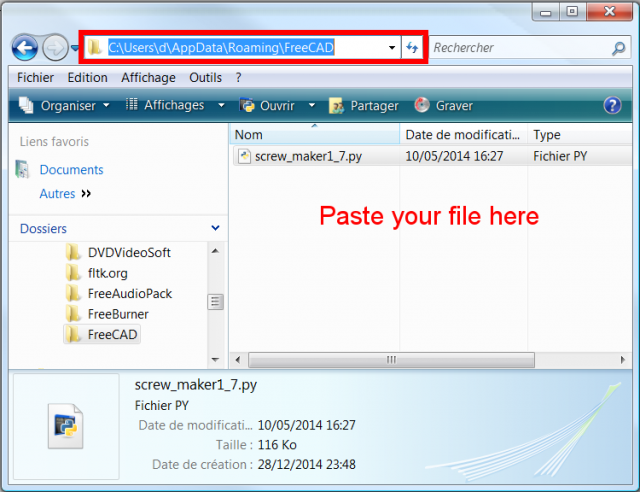
4 : Enter in the newly created directory, move about the file, click the right mouse button and click on Cut.
5 : Return to your File explorer remained open in the macro location (here C:\Users\your_user_name\AppData\Roaming\FreeCAD\) and close the File explorer.
6 : Open FreeCAD click Menu > Macro > Macros or the click the bottom "Open a dialog to let you execute a macro Recorded"
7 : The macros window open , select your macro and click the button Execute
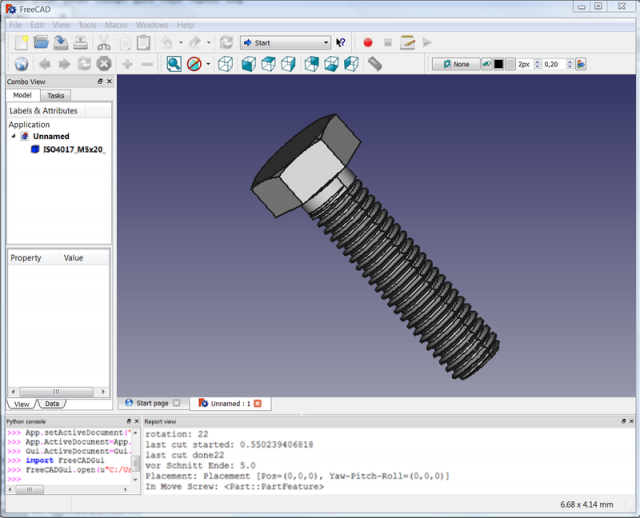
8 : Your macro is executed enter the data and click the Create button
9 : Whaouu
Section if the text are not display:
For those who see no information is displayed.
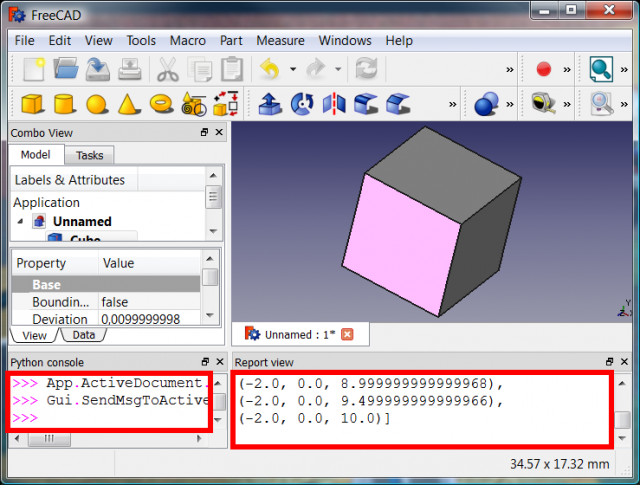
Some macros display information on the screen in general they are displayed in the report view.
FreeCAD use two methods to display the information in the window view report.
1 : Commands
App = FreeCAD
App.Console.PrintMessage ("Hello World ! \n")
App.Console.PrintError ("Hello World ! \n")
App.Console.PrintWarning ("Hello World ! \n")
or
FreeCAD.Console.PrintMessage ("Hello World ! \n")
FreeCAD.Console.PrintError ("Hello World ! \n")
FreeCAD.Console.PrintWarning ("Hello World ! \n")
or
print "Hello World !"
To see the information displayed in the console you should:
1 : Open FreeCAD
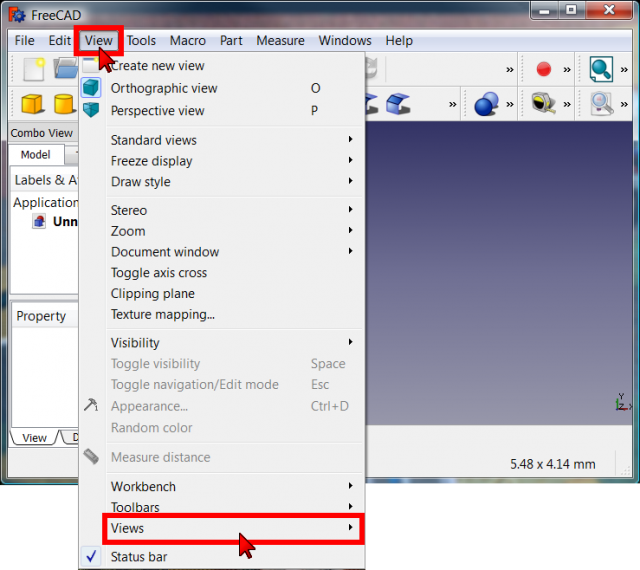
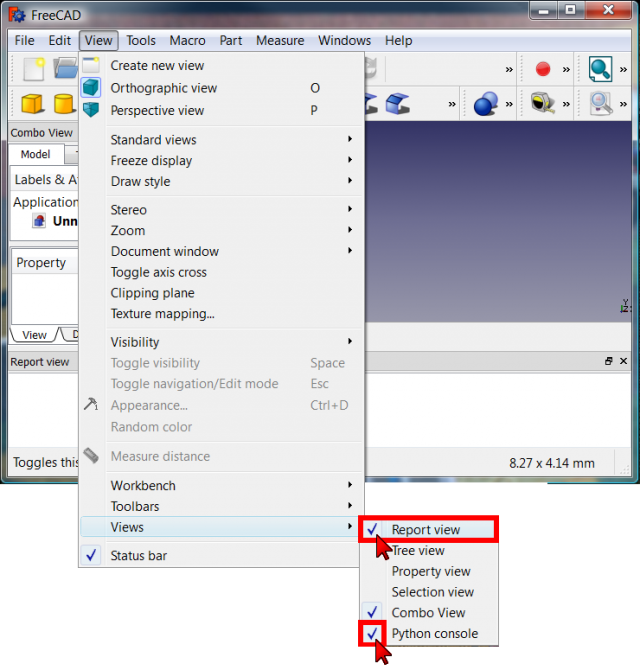
2 : Click the View menu and Views
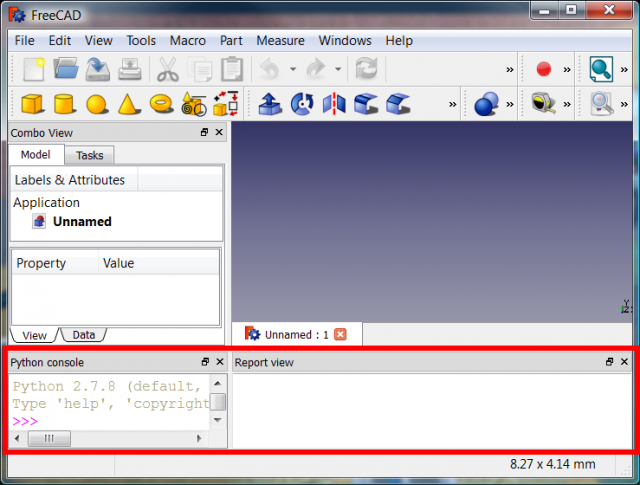
3 : Check Report View and Python Console
4 : the windows are enabled and available commands like "App.Console.PrintMessage" is configured to the "Report View"
2 : command "print" which is a Python command.
It is possible that this command does not display the expected string.
For information to be displayed in the window do this :
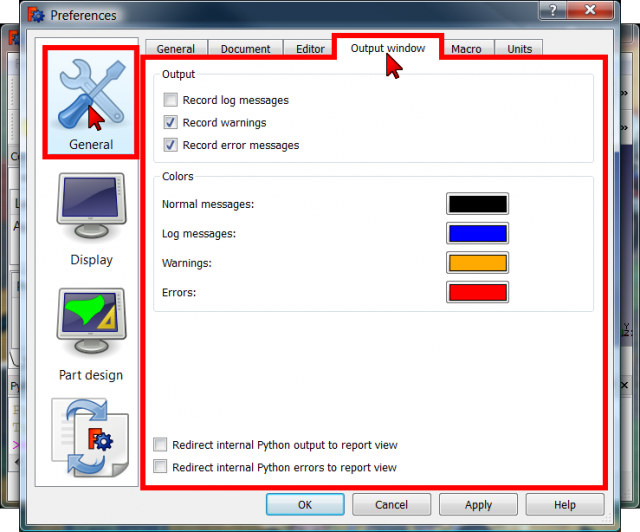
1 : Click the Edit menu and then Preferences
2 : In the new window, click General, and select the Output window tab
3 : check both boxes:
![]() Redirect internal Python output to Report view
Redirect internal Python output to Report view
![]() Redirect internal Python errors to Report view
Redirect internal Python errors to Report view
and click the OK button
4 : the setup is complete you should see all.
End tutorial good job.
Links
The Macros recipes page
Other easy macro installer freecad-pluginloader
The Macros recipes page

