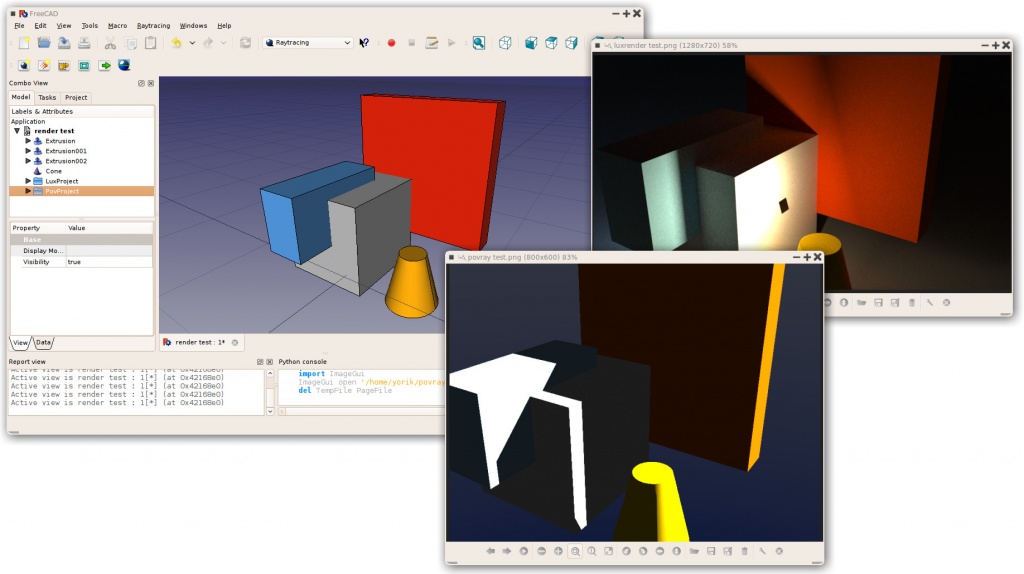
Ten moduł przeznaczony jest do wysyłania zawartości twojej sceny do zewnętrznego [http://en.wikipedia.org/wiki/ Rendering_(computer_graphics) renderera] by wygenerować fotorealistyczne obrazy twojej pracy. Moduł raytracingu jest nadal w bardzo wczesnym stadium kompletacji, więc nie masz aktualnie dostępnych zbyt wielu opcji. Aktualnie, jest zaimplementowany tylko bazowy zbiór narzędzi do eksporty obiektów Części (Part) jako pliki POV-ray. Te tpliki mogą być załadowane do POV-raya i tam renderowane.
Currenly, two renderers are supported: povray and luxrender. To be able to render directly from FreeCAD, at least one of those renderers must be installed on your system, and its path must be configured in the FreeCAD Raytracing preferences. Without any renderer installed, though, you are still able to export a scene file that can be used in any of those renderers later, or on another machine.
The raytracing workbench works with templates, which are complete scene files for the given external renderer, including lights and possibly additional geometry such as ground planes. These scene files contain placeholders, where FreeCAD will insert the position of the camera, and geometry and materials information of each of the objects you insert in the project. That modified scene file is what is then exported to the external renderer.
Contents
Narzędzia graficzne
Narzędzia do eksportu twojej pracy 3\d do zewnętrznego renderera
-
 Stwórz projekt POV-Ray: Tworzy projekt POV-Raya
 -
 Umieść informacje widoku: Umieszcza informacje widoku (pozycja kamery itp.) w aktualnym projekcie POV-Raya
 -
 Umieść informacje o części: Umieszcza zaznaczony obiekt w aktualnym projekcie POV-Raya
Typical workflow
- Create or open a FreeCAD project, add some Part-based objects (meshes are currently not supported)
- Create a Raytracing project (luxrender or povray)
- Select the objects you wish to add to the raytracing project and add them to the project with the "Insert Part" tool
- Export or render directly
Creating a povray file manually
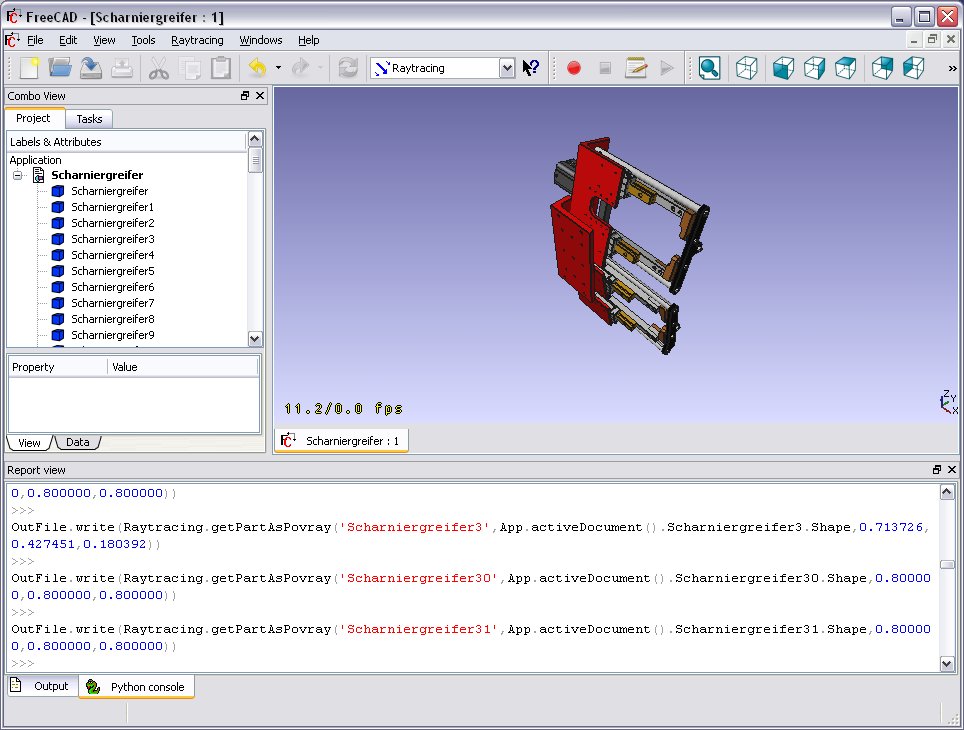
The utility tools described above allow you to export the current 3D view and all of its content to a Povray file. First, you must load or create your CAD data and position the 3D View orientation as you wish. Then choose "Utilities->Export View..." from the raytracing menu.
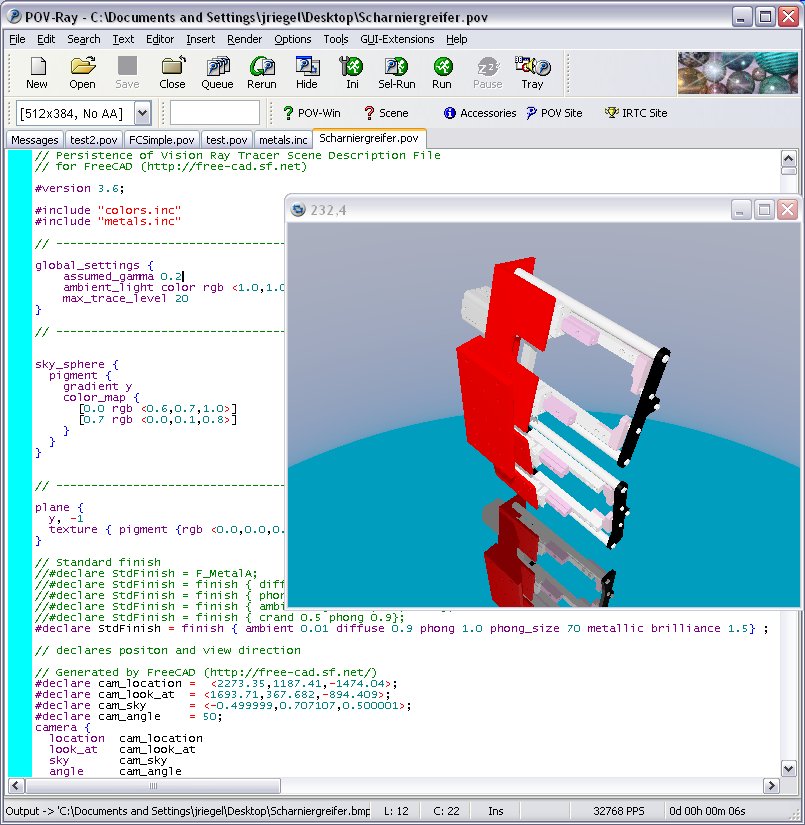
You will be asked for a location to save the resulting *.pov file. After that you can open it in Povray and render:
As usual in a renderer you can make big and nice pictures:
Skryptowanie
Outputting render files
The Raytracing and RaytracingGui modules provide several methods to write scene contents as povray or luxrender data. The most useful are Raytracing.getPartAsPovray() and Raytracing.getPartAsLux() to render a FreeCAD Part object into a povray or luxrender definition, and RaytracingGui.povViewCamera() and RaytracinGui.luxViewCamera() to get the current point of view of the FreeCAD 3D window into povray or luxrender format.
Sposób użycia powyższych funkcji w pythonie:
import Raytracing,RaytracingGui
OutFile = open('C:/Documents and Settings/jriegel/Desktop/test.pov','w')
OutFile.write(open(App.getResourceDir()+'Mod/Raytracing/Templates/ProjectStd.pov').read())
OutFile.write(RaytracingGui.povViewCamera())
OutFile.write(Raytracing.getPartAsPovray('Box',App.activeDocument().Box.Shape,0.800000,0.800000,0.800000))
OutFile.close()
del OutFile
And the same for luxrender:
import Raytracing,RaytracingGui
OutFile = open('C:/Documents and Settings/jriegel/Desktop/test.lxs','w')
OutFile.write(open(App.getResourceDir()+'Mod/Raytracing/Templates/LuxClassic.lxs').read())
OutFile.write(RaytracingGui.luxViewCamera())
OutFile.write(Raytracing.getPartAsLux('Box',App.activeDocument().Box.Shape,0.800000,0.800000,0.800000))
OutFile.close()
del OutFile
Creating a custom render object
Apart from standard povray and luxrender view objects that provide a view of an existing Part object, and that can be inserted in povray and luxrender projects respectively, a third object exist, called RaySegment, that can be inserted either in povray or luxrender projects. That RaySegment object is not linked to any of the FreeCAD objects, and can contain custom povray or luxrender code, that you might wish to insert into your raytracing project. You can also use it, for example, to output your FreeCAD objects a certain way, if you are not happy with the standard way. You can create and use it like this from the python console:
myRaytracingProject = FreeCAD.ActiveDocument.PovProject
myCustomRenderObject = FreeCAD.ActiveDocument.addObject("Raytracing::RaySegment","myRenderObject")
myRaytracingProject.addObject(myCustomRenderObject)
myCustomRenderObject.Result = "// Hello from python!"
Linki
POVRay
- http://www.spiritone.com/~english/cyclopedia/
- http://www.povray.org/
- http://en.wikipedia.org/wiki/POV-Ray
Luxrender
Future possible renderers to implement
- http://www.yafaray.org/
- http://www.mitsuba-renderer.org/
- http://www.kerkythea.net/
- http://www.artofillusion.org/
Currently there is a new Renderer Workbench in development to support multiple back-ends such as Lux Renderer and Yafaray. Information for using the development version can be viewed at Render_project
For Development status of the Render Module look here Raytracing_project
Templates
FreeCAD comes with a couple of default templates for povray and luxrender, but you can easily create your own. All you need to do is to create a scene file for the given renderer, then edit it manually with a text editor to insert special tags that FreeCAD will recognize and where it will insert its contents (camera and objects data)
Povray
Povray scene files (with extension .pov) can be created manually with a text editor (povray is made primarily to be used as a scripting language), but also with a wide range of 3D applications, such as blender. On the povray website you can find further information and a list of applications able to produce .pov files.
When you have a .pov file ready, you need to open it with a text editor, and do two operations:
- Strip out the camera information, because FreeCAD will place its own camera data. To do so, locate a text block like this: camera { ... }, which describes the camera parameters, and delete it (or put "//" in front of each line to comment them out).
- Insert the following line somewhere: //RaytracingContent. This is where FreeCAD will insert its contents (camera and objects data). You can, for example, put this line at the very end of the file.
Note that FreeCAD will also add some declarations, that you can use in your template, after the //RaytracingContent tag. These are:
- cam_location: the location of the camera
- cam_look_at: the location of the target point of the camera
- cam_sky: the up vector of the camera.
- cam_angle: the angle of the camera
If you want, for example, to place a lamp above the camera, you can use this:
light_source {
 cam_location + cam_angle * 100
 color rgb <10, 10, 10>
}
Luxrender
Luxrender scene files (with extension.lxs) can either be single files, or a master .lxs file that includes world definition (.lxw), material definition (.lxm) and geometry definition (.lxo) files. You can work with both styles, but it is also easy to transform a group of 4 files in a single .lxs file, by copying the contents of each .lxw, .lxm and .lxo file and pasting it at the point where that file is inserted in the master .lxs file.
Luxrender scene files are hard to produce by hand, but are easy to produce with many 3D applications such as blender. On the luxrender website, you'll find more information and plugins for the main 3D applications out there.
If you will work with separated .lxw, .lxm and .lxo files, beware that the final .lxs exported by FreeCAD might be at a different location than the template file, and therefore these files might not be found by Luxrender at render time. In this case you should or copy these files to the location of your final file, or edit their paths in the exported .lxs file.
If you are exporting a scene file from blender, and wish to merge everything into one single file, you will need to perform one step before exporting: By default, the luxrender exporter in blender exports all mesh geometry as separate .ply files, instead of placing the mesh geometry directly inside the .lxo file. To change that behaviour, you need to select each of your meshes in blender, go to the "mesh" tab and set the option "export as" to "luxrender mesh" for each one of them.
After you have your scene file ready, to turn it into a FreeCAD template, you need to perform the following steps:
- Locate the camera position, a single line that begins with LookAt, and delete it (or place a "#" at the beginning of the line to comment it out)
- At that place, insert the following line: #RaytracingCamera
- At a desired point, for example just after the end of the materials definition, before the geometry information, or at the very end, just before the final WorldEnd line, insert the following line: #RaytracingContent. That is where FreeCAD will insert its own objects.
Note that in luxrender, the objects stored in a scene file can define transformation matrixes, that perform location, rotation or scaling operations. These matrixes can stack and affect everything that come after them, so, by placing your #RaytracingContent tag at the end of the file, you might see your FreeCAD objects affected by a transformation matrix placed earlier in the template. To make sure that this doesn't happen, place your #RaytracingContent tag before any other geometry object present in the template. FreeCAD itself won't define any of those transformation matrixes.
Exporting to Kerkythea
Although direct export to the Kerkythea XML-File-Format is not supported yet, you can export your Objects as Mesh-Files (.obj) and then import them in Kerkythea.
- if using Kerkythea for Linux, remember to install the WINE-Package (needed by Kerkythea for Linux to run)
- you can convert your models with the help of the mesh workbench to meshes and then export these meshes as .obj-files
- If your mesh-export resulted in errors (flip of normals, holes ...) you may try your luck with netfabb studio basic
- Free for personal use, available for Windows, Linux and Mac OSX.
- It has standard repair tools which will repair you model in most cases.
- another good program for mesh analysing/repairing is Meshlab
- Open Source, available for Windows, Linux and Mac OSX.
- It has standard repair tools which will repair you model in most cases (fill holes, re-orient normals, etc.)
- you can use "make compound" and then "make single copy" or you can fuse solids to group them before converting to meshes
- remember to set in Kerkythea an import-factor of 0.001 for obj-modeler, since Kerkythea expects the obj-file to be in m (but standard units-scheme in FreeCAD is mm)
- Within WIndows 7 64-bit Kerkythea does not seem to be able to save these settings.
- So remember to do that each time you start Kerkythea
- if importing multiple objects in Kerkythea you can use the "File > Merge" command in Kerkythea
Links


